Alrighty then.
I posted this recipe on facebook and everyone went nuts. So, I decided to to a step by step with pictures....kind of.
Step One:
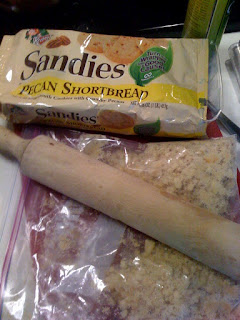
For the crust:
1 package Pecan Sandies cookies, crushed (this can also be done in the food processor)
1 stick melted butter (I guess margarine would work, but organic unsalted butter is my fave)
Preheat oven to 350. Mix ingredients together and press into pie pan. Cook for 10-15 minutes and remove from oven.
.jpg)
Step Two:
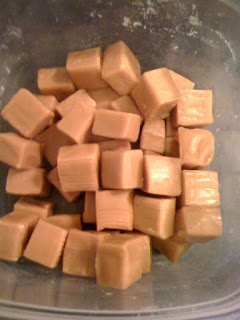
1 package of caramels, unwrapped (Papa is REALLY good at unwrapping caramels; I just have to resign myself to the fact that I may lose a few for the cause during in this process)
1/3 cup heavy whipping cream
Heat in saucepan over low heat until melted and pour into crust. Let cool.
.jpg)

As you can see, I had my bowl of caramel in a bowl of ice because I am really impatient during this whole cooling process.
Step Three:
Toasted pecans
These go on top of the caramel layer
To toast your pecans, melt some butter and toss the pecans lightly and toast them in the oven until brown-er...you know, since pecans are already brown they will just be brown-er... halves, pieces, chopped....I don't think it really matters as long as they are not whole in the shell. But anyone that tries to use whole pecans in the shell probably doesn't need to be cooking to begin with. Seriously.
I actually didn't melt butter this time. I used olive oil cooking spray. I cheated. I altered my own recipe. Sue me. You couldn't tell the difference.
.jpg)
Step Four:
1 8oz. package softened cream cheese
2 cups powdered sugar
Mix together with mixer and spread on top of the COOLED caramel/pecan layer.
(This is why I had the bowl of caramel in the ice.)
.jpg)
.jpg)
Step Five:
.jpg)
This is a two-step layer.... in this layer we are basically making chocolate whipped cream. This is really easy so long as you pay attention to this really important part: YOU HAVE TO LET THE CHOCOLATE COOL before you add it to the whipped cream. Otherwise, your fresh whipped cream deflates/melts and the chocolate separates and then you might be tempted to swear or cry. It can get really ugly. There was some serious wailing and gnashing of teeth in my kitchen once. It was only because I had really talked this pie up to my Mom and was trying to pull of this fabulous dessert and showcase my grand culinary skills and it ended up being the ugliest pie I ever made. My mother was very gracious in trying to repair my damaged ego and told me how good it was despite the way it looked.
ANYWAY. So you HAVE to let the chocolate cool.
Okay, back to the program.
1/2 a bar of Baker's semi-sweet chocolate (which actually used to be a whole BAR. Now it comes divided into all these squares.....so I guess that should be modified to 1/2 a BOX of Baker's semi-sweet.
2 Tbs. heavy cream
Melt in saucepan over very low heat or in a double-boiler if you are fancy enough to have such a thing. Then let it cool while you are making the whipped cream.
.jpg)
yummy melted chocolate :)
Whipped cream:
1 pint of heavy whipping cream
1/4 cup of powdered sugar (cause it is so good that way)
Mix ingredients with a mixer on high speed until you have whipped cream. Divide in half.
To one half, gently fold in the melted chocolate until you have fabulous chocolate whipped cream and spread on top of the cream cheese layer.
.jpg)
I actually stopped taking pictures at this point, which I know is sort of anti-climactic, but it was all I could do to fend off the hoard of
vultures children and Papa who were waiting to pounce. Don't worry; I'll fix it.
Now, the rest of The Pie is simple:
On top of the glorious chocolate whipped cream goes:
The other half of the whipped cream. YUM.
Finally, I suppose the last step is optional. However, the way I see it....if you have made it this far - seeing as how the pie only has somewhere in the neighborhood of 64 fat grams per slice - you may as well just go ahead and proceed:
Grated chocolate. I usually use Hershey bars and a plain ole cheese grater. However, you can use the other half of that Baker's semi-sweet bar as well. :)
And even though I quit taking pictures, (and with the exception of the fake crust in the picture) your end result should look something like this:

Let me know if you try it and how it turns out! :)
Ours was FABULOUS.
~Gena


.jpg)
.jpg)

.jpg)
.jpg)
.jpg)
.jpg)
.jpg)
.jpg)
